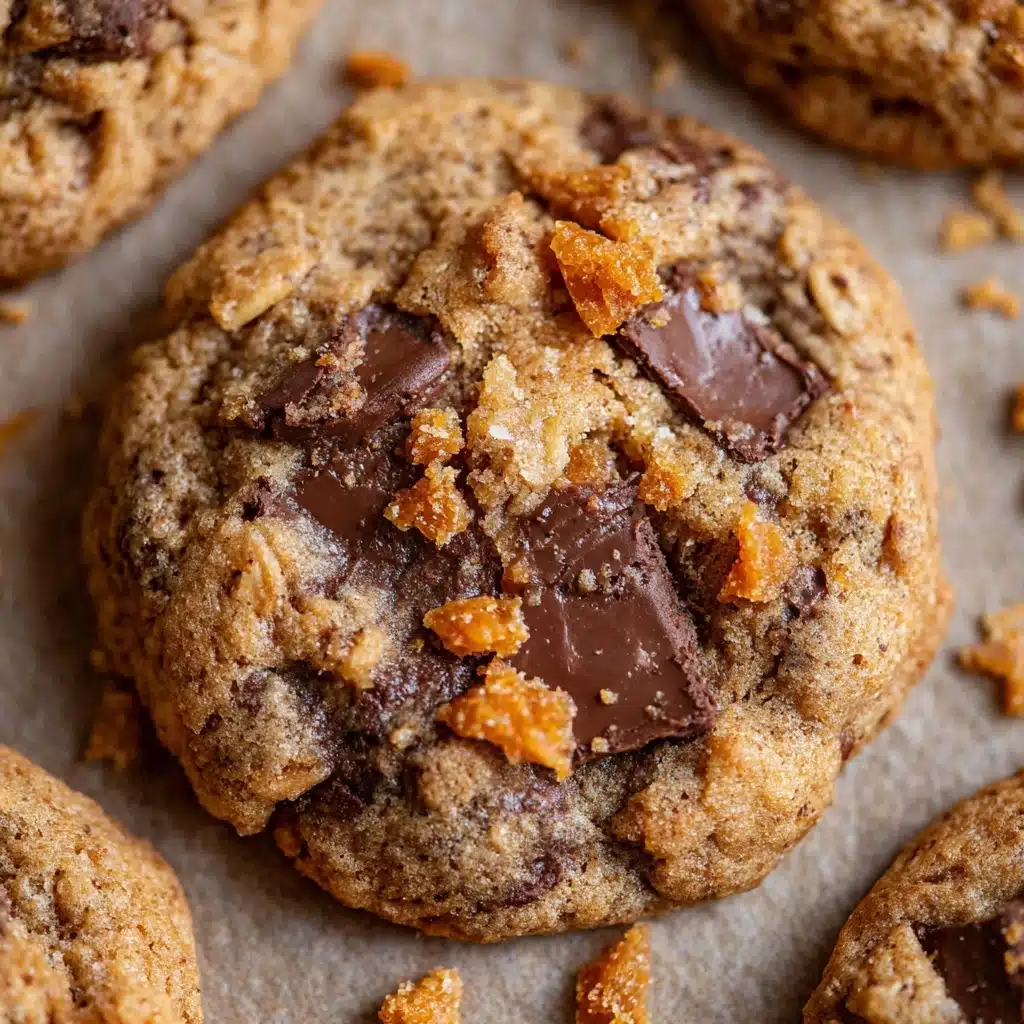
Peanut Butter Butterfinger Cookies Recipe
There is something irresistibly nostalgic and delightfully indulgent about Peanut Butter Butterfinger Cookies. These cookies combine the rich, creamy goodness of peanut butter with the crunchy, buttery crunch of Butterfinger candy pieces, creating a fantastic texture and flavor explosion in every bite. Soft, chewy, and packed full of candy-coated sweetness, Peanut Butter Butterfinger Cookies are the perfect treat to brighten up any day or become a crowd-pleasing staple for your gatherings. If you love peanut butter and Butterfinger bars, this recipe is your dream come true.
Ingredients You’ll Need
The magic behind Peanut Butter Butterfinger Cookies lies in their simple yet perfectly balanced ingredients. Each element plays a crucial role in achieving that ideal chewy texture, rich peanut flavor, and delightful crunch that make this cookie so special.
- 3/4 cup butter, softened: Adds creaminess and helps create a tender crumb.
- 1/2 cup granulated sugar: Provides sweetness and helps with spreading during baking.
- 1/2 cup brown sugar, packed: Gives a slight molasses depth and chewiness.
- 1 cup peanut butter: The star of the show; use a creamy, non-natural peanut butter for best results.
- 1 large egg: Binds the dough together and adds moisture.
- 1 & 1/2 teaspoons vanilla: Enhances the flavor complexity and sweetness.
- 1 & 1/2 cups all-purpose flour: The structure to hold everything together; spoon and level for accuracy.
- 1/2 teaspoon baking soda: Helps cookies rise and develop a light texture.
- 1/2 teaspoon baking powder: Assists with gentle leavening for fluffiness.
- 1/4 teaspoon kosher salt: Balances the sweetness and highlights flavors.
- 16 ounces Butterfinger, chopped: Brings that iconic crisp, buttery crunch that transforms these cookies into a candy lover’s delight.
How to Make Peanut Butter Butterfinger Cookies
Step 1: Cream the Butter and Sugars
Start by beating the softened butter until it’s smooth and creamy. This step is vital because well-creamed butter creates a tender base for the cookies. Add both the granulated and brown sugars and beat them in until the mixture is fluffy and light in color. This aeration helps with texture, making each cookie soft but not dense.
Step 2: Incorporate the Peanut Butter, Egg, and Vanilla
Next, mix in the peanut butter—you want to use a creamy, processed peanut butter like Jif for that perfect consistency. Then add the egg and vanilla extract, beating everything until just combined. These ingredients bind the dough and enrich the flavor with warmth and a nutty aroma.
Step 3: Combine the Dry Ingredients
In a separate bowl, whisk together the all-purpose flour, baking soda, baking powder, and salt. Slowly add this dry mix to the wet ingredients, stirring gently so you don’t overwork the dough. Over-mixing can lead to tough cookies, and no one wants that!
Step 4: Fold in the Butterfinger Pieces
Now for the best part: folding in the chopped Butterfinger candy. Whether you have Butterfinger Bits or you chop full or fun-sized bars, these little crunchy chunks elevate the cookie’s texture and flavor. Gently mix them into the dough, making sure they’re evenly distributed without breaking up too much.
Step 5: Chill the Dough
Cover your bowl and chill the dough for anywhere from 15 minutes up to 24 hours. Chilling is optional but recommended—it helps the dough firm up, makes it easier to handle, and lets the flavors meld, resulting in cookies with a more developed taste.
Step 6: Bake to Perfection
Preheat your oven to 350 degrees Fahrenheit. Using a cookie scoop or your hands, form 2-inch balls of dough and space them on a lined baking sheet. Bake for about 10 minutes until the edges are set and the cookies are puffy. If your cookies haven’t spread enough, you can gently press them down with a spatula right after removing from the oven. Don’t forget to sprinkle any leftover Butterfinger pieces on top for an extra candy burst!
How to Serve Peanut Butter Butterfinger Cookies
Garnishes
To make your Peanut Butter Butterfinger Cookies even more irresistible, consider adding a few garnishes. A light dusting of powdered sugar adds a pretty, festive touch. For extra indulgence, drizzle some melted chocolate or peanut butter over the cookies to enhance their richness and visual appeal.
Side Dishes
These cookies shine on their own, but pairing them with a cold glass of milk, creamy vanilla ice cream, or even a cup of hot coffee or tea can elevate your snack or dessert experience. The combination of warm, nutty cookies and cool or warm beverages is downright comforting and perfect for sharing.
Creative Ways to Present
If you’re bringing Peanut Butter Butterfinger Cookies to a party or gifting them, get creative with your presentation. Stack them in a clear jar tied with a ribbon, arrange them on a colorful plate with napkins, or package them in decorative bakery boxes with a handwritten note. Presentation makes all the difference when you want to impress friends or family.
Make Ahead and Storage
Storing Leftovers
Keep any leftover cookies fresh by storing them in an airtight container at room temperature. They will stay soft and chewy for up to three days. This is perfect for when you want to savor them slowly without the worry of them drying out.
Freezing
You can freeze either the cookie dough or the baked cookies. For dough, shape it into balls and freeze them in a zip-top bag for up to three months. When you’re ready to bake, simply bake from frozen, adding a minute or two to the original baking time. Baked cookies also freeze well in sealed containers for up to four weeks and thaw quickly at room temperature.
Reheating
To enjoy frozen baked cookies, let them thaw at room temperature for about 30 minutes. If you prefer them warm, give them a quick 10-15 second zap in the microwave to soften the peanut butter and revive that just-baked feel. Just don’t overheat or you’ll lose the cookie’s structure!
FAQs
Can I use natural peanut butter for these cookies?
It’s best to use a creamy, processed peanut butter like Jif or Skippy. Natural peanut butter tends to be oilier and can affect the dough’s texture and how the cookies bake.
What can I substitute if I can’t find Butterfinger candy?
You might try chopped peanut butter cups or Heath bar pieces for a similar crunchy, sweet, and buttery effect. Just keep in mind that Butterfinger has its unique crisp texture that’s hard to replicate exactly.
Is chilling the dough really necessary?
Chilling isn’t mandatory but highly recommended. It firms up the dough, making it easier to handle, and helps the flavors develop. However, if you’re short on time, you can bake right away—the cookies will still be delicious.
How do I prevent these cookies from spreading too much?
Make sure your butter is just softened, not melted, and chill the dough before baking. Also, leaving enough space between dough balls on the baking sheet helps maintain their shape.
Can I make these cookies gluten-free?
Yes! Substitute the all-purpose flour with a gluten-free 1:1 baking flour blend. The texture may vary slightly, but they’ll still be deliciously peanut buttery and crunchy thanks to the Butterfinger candy.
Final Thoughts
I genuinely believe once you try these Peanut Butter Butterfinger Cookies, they’ll become one of your absolute favorites, just like they did for me. They are the perfect marriage of creamy, chewy peanut butter goodness and that unmistakable crunch of Butterfinger candy. Whether for a cozy night in, a holiday party, or just because you need a sweet pick-me-up, these cookies never disappoint. So grab your ingredients and get baking—you’re about to create cookie magic!
PrintPeanut Butter Butterfinger Cookies Recipe

Delight in the perfect blend of peanut butter and crunchy Butterfinger candy in these irresistible Peanut Butter Butterfinger Cookies. Soft, chewy, and packed with buttery peanut flavor and crispy candy pieces, these cookies are a must-bake treat for any candy lover.
- Prep Time: 20 minutes
- Cook Time: 10 minutes
- Total Time: 30 minutes to 1 hour 30 minutes (including optional chilling)
- Yield: About 25 cookies 1x
- Category: Dessert
- Method: Baking
- Cuisine: American
- Diet: Vegetarian
Ingredients
Wet Ingredients
- 3/4 cup butter, softened (1 and 1/2 sticks)
- 1/2 cup granulated sugar
- 1/2 cup brown sugar, packed
- 1 cup creamy peanut butter (do not use natural peanut butter, Jif recommended)
- 1 large egg
- 1 1/2 teaspoons vanilla extract
Dry Ingredients
- 1 1/2 cups all-purpose flour, spooned and leveled
- 1/2 teaspoon baking soda
- 1/2 teaspoon baking powder
- 1/4 teaspoon kosher salt
Add-ins
- 16 ounces Butterfinger candy, chopped (about 2 bags of 8-ounce Butterfinger Bits, or 24 fun size bars, or 8 full size bars)
Instructions
- Cream the butter and sugars: In a large bowl or stand mixer, beat 3/4 cup softened butter until creamy and smooth, scraping down the sides. Add 1/2 cup granulated sugar and 1/2 cup packed brown sugar and beat for about 2 minutes until fluffy with no large butter chunks.
- Add peanut butter, egg, and vanilla: Mix in 1 cup creamy peanut butter. Then add 1 large egg and 1 1/2 teaspoons vanilla extract. Beat until just combined, scraping the bowl as needed.
- Combine dry ingredients: In a separate bowl, whisk together 1 1/2 cups all-purpose flour, 1/2 teaspoon baking soda, 1/2 teaspoon baking powder, and 1/4 teaspoon kosher salt. Add these dry ingredients to the wet mixture, initially stirring gently to combine.
- Mix the dough: Turn the mixer on low to combine just until the dough starts to come together but still has some visible flour. Avoid overmixing to prevent tough cookies. Scrape the bowl thoroughly.
- Fold in Butterfinger pieces: Gently fold in 16 ounces of chopped Butterfinger candy until just incorporated. Aim for coarser chunks for best texture.
- Chill the dough: Cover the dough and chill in the refrigerator for 15 minutes up to 24 hours. This step helps with flavor development and handling but is optional.
- Preheat oven and prepare pans: Heat oven to 350°F (175°C). Line two baking sheets with parchment paper or silicone mats.
- Form cookies: Using a 2-inch cookie scoop or spoon, form dough into balls and place them 1-2 inches apart on prepared baking sheets. Aim for about 12 cookies per half sheet.
- Bake: Bake at 350°F for about 10 minutes. Cookies are done when edges are set and centers are no longer shiny. They will be puffy but spread slightly. If not spread enough, gently press tops with a spatula after removing from oven or near the end of baking.
- Cool: Let cookies rest on the baking sheet for at least 5 minutes to set up, then transfer to wire racks to cool completely.
- Serve and store: These cookies are best at room temperature. Store leftovers in an airtight container for up to 3 days. Cookie dough can be frozen up to 3 months and baked directly from frozen with a slight increase in baking time. Baked cookies can be frozen for 4 weeks.
Notes
- Use exactly 16 ounces of chopped Butterfinger candy: this equals two 8-ounce bags of Butterfinger Bits, 24 fun-size bars (~0.8 oz each), or 8 full-size bars (~1.9 oz each).
- Chilling the dough is recommended but optional; it improves flavor and dough handling.
- If you cannot find Butterfinger Bits, chopping regular candy bars works just as well.
- Pressing down cookies after baking helps them spread evenly since dough can be soft.
- Cookies are best eaten at room temperature rather than warm, as the Butterfinger pieces melt and become chewy when hot.
- Dough and cookies freeze very well for make-ahead convenience.
Nutrition
- Serving Size: 1 cookie
- Calories: 169 kcal
- Sugar: 13 g
- Sodium: 120 mg
- Fat: 9 g
- Saturated Fat: 3 g
- Unsaturated Fat: 6 g
- Trans Fat: 1 g
- Carbohydrates: 19 g
- Fiber: 1 g
- Protein: 4 g
- Cholesterol: 17 mg
Keywords: butterfinger, candy, cookies, peanut butter, dessert, chocolate candy, baked goods