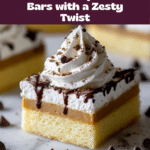
Cannoli Bars Recipe
Introduction
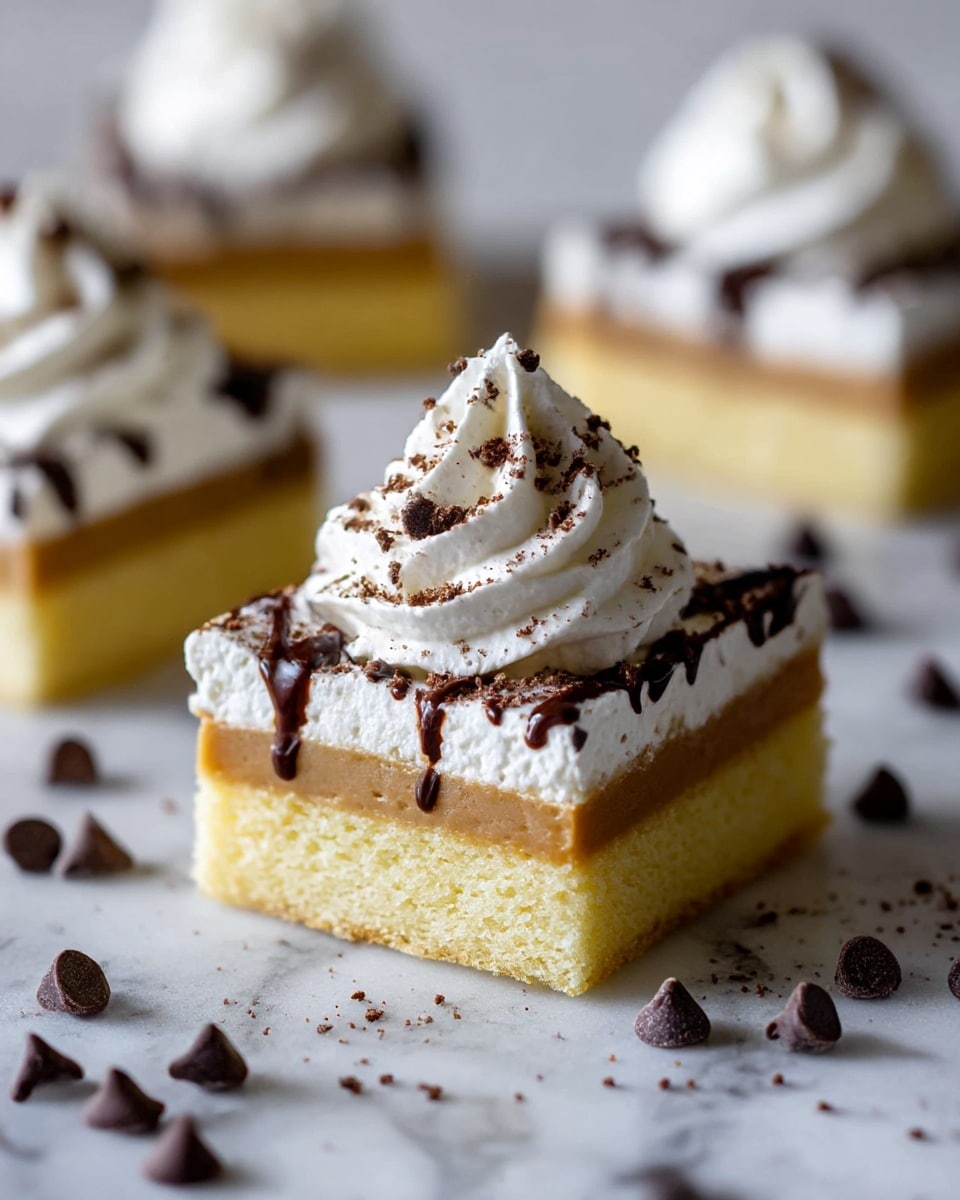
Cannoli bars are a delightful twist on the classic Italian dessert, combining a crisp cookie crust with a creamy ricotta filling studded with chocolate chips. Easy to make and perfect for sharing, these bars offer all the flavors of traditional cannoli in a convenient, sliceable form.
Ingredients
- 1 1/2 cups all-purpose flour (for the cookie crust)
- 1/2 cup granulated sugar (for the cookie crust)
- 1/2 cup unsalted butter (melted and slightly cooled; for the cookie crust)
- 1/4 teaspoon kosher salt (for the cookie crust)
- 1 teaspoon vanilla extract (for the cookie crust)
- 1/2 teaspoon ground cinnamon (for the cookie crust)
- 2 cups whole milk ricotta cheese (about 16 oz / 450 g; drain if very wet)
- 4 oz cream cheese (softened)
- 1/2 cup granulated sugar (for the filling)
- 1/4 cup powdered sugar (for the filling)
- 2 large eggs (at room temperature)
- 1 teaspoon vanilla extract (for the filling)
- 1/2 teaspoon almond extract (optional but recommended; for the filling)
- 1 tablespoon orange zest (or lemon zest for variation)
- 1/4 teaspoon kosher salt (for the filling)
- 3/4 cup mini chocolate chips (about 130 g)
- 1/4 cup pistachios (finely chopped, optional, for topping)
- parchment paper (for lining the baking pan)
- nonstick spray or butter (optional, for lightly greasing the pan under parchment)
Instructions
- Step 1: Preheat your oven to 350°F (175°C). Line a 9×9-inch baking pan with parchment paper, leaving overhang on two opposite sides to create handles. Lightly grease the pan under the parchment if desired to help it stay in place.
- Step 2: In a medium mixing bowl, whisk together the flour, granulated sugar, cinnamon, and salt for the crust. Pour in the melted, slightly cooled butter and vanilla extract. Stir until the mixture resembles damp sand and starts to clump; it should be crumbly but hold together when pressed.
- Step 3: Transfer the crust mixture to the prepared pan and press it firmly and evenly into the bottom using your fingertips or the bottom of a measuring cup. Bake for 10–12 minutes, just until the crust looks set and slightly puffed but not browned. While the crust bakes, prepare the filling.
- Step 4: In a large bowl, beat the softened cream cheese with a hand mixer on medium speed until smooth and fluffy, 1–2 minutes. Add the ricotta and beat again until very smooth and well combined, scraping down the sides of the bowl as needed.
- Step 5: Add the granulated sugar, powdered sugar, salt, vanilla extract, almond extract (if using), and orange zest to the ricotta mixture. Beat on medium speed until creamy and slightly thickened, about 1–2 minutes.
- Step 6: Add the eggs one at a time, mixing on low speed just until each egg is incorporated. Do not overmix. Gently fold in the mini chocolate chips with a spatula until evenly distributed.
- Step 7: When the crust comes out of the oven, let it cool for about 5 minutes. Pour the ricotta filling evenly over the warm crust and spread it into the corners. If using pistachios, sprinkle them evenly over the top.
- Step 8: Return the pan to the oven and bake at 350°F (175°C) for 30–35 minutes, until the edges are set, the center is mostly set with a slight wobble, and a toothpick inserted near the center comes out mostly clean with a few moist crumbs. If the top begins to brown too quickly, tent loosely with foil for the last 5–10 minutes.
- Step 9: Remove the pan from the oven and place it on a wire rack. Cool completely to room temperature, then cover and chill in the refrigerator for at least 3 hours, preferably overnight, until the filling is fully set.
- Step 10: Use the parchment overhang to lift the chilled slab out of the pan onto a cutting board. For the cleanest cuts, run a sharp knife under hot water, wipe dry, and slice into 16–20 bars, wiping the knife between cuts. Serve chilled or slightly cool.
Tips & Variations
- Drain the ricotta cheese well before using to prevent a watery filling.
- Substitute lemon zest for the orange zest to create a brighter citrus flavor.
- Add a sprinkle of cinnamon sugar on top before baking for extra sweetness and texture.
- For a nut-free version, omit the pistachios or replace with finely chopped toasted almonds.
Storage
Store the cannoli bars covered in the refrigerator for up to 4 days. They are best served chilled or at room temperature. To reheat, allow them to sit out for 10–15 minutes or warm gently in a low oven for a few minutes, but avoid microwaving as it can affect texture.
How to Serve
Serve this delicious recipe with your favorite sides.
FAQs
Can I use part-skim ricotta instead of whole milk ricotta?
Yes, but whole milk ricotta tends to be creamier and yields a richer texture. Part-skim ricotta may result in a slightly drier filling.
How do I prevent the crust from getting soggy?
Par-baking the crust helps set it before adding the filling, which prevents sogginess. Also, draining the ricotta well reduces excess moisture in the filling.
PrintCannoli Bars Recipe
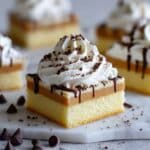
These Cannoli Bars combine the classic flavors of traditional Italian cannoli into an easy-to-make bar dessert. Featuring a buttery, cinnamon-infused cookie crust and a creamy ricotta and cream cheese filling studded with mini chocolate chips and topped with optional pistachios, these bars are baked to perfection and chilled for the best texture. Perfect for dessert lovers craving the rich taste of cannoli in a convenient sliceable form.
- Prep Time: 15 minutes
- Cook Time: 45 minutes
- Total Time: 4 hours (including chilling time)
- Yield: 16–20 bars 1x
- Category: Dessert
- Method: Baking
- Cuisine: Italian-American
- Diet: Vegetarian
Ingredients
Cookie Crust
- 1 1/2 cups all-purpose flour
- 1/2 cup granulated sugar
- 1/2 cup unsalted butter, melted and slightly cooled
- 1/4 teaspoon kosher salt
- 1 teaspoon vanilla extract
- 1/2 teaspoon ground cinnamon
Filling
- 2 cups whole milk ricotta cheese (about 16 oz / 450 g), drained if very wet
- 4 oz cream cheese, softened
- 1/2 cup granulated sugar
- 1/4 cup powdered sugar
- 2 large eggs, at room temperature
- 1 teaspoon vanilla extract
- 1/2 teaspoon almond extract (optional but recommended)
- 1 tablespoon orange zest (or lemon zest as a variation)
- 1/4 teaspoon kosher salt
- 3/4 cup mini chocolate chips (about 130 g)
Topping (Optional)
- 1/4 cup finely chopped pistachios
Other
- Parchment paper, for lining the baking pan
- Nonstick spray or butter, optional, for lightly greasing the pan under the parchment
Instructions
- Prep the pan and oven: Preheat your oven to 350°F (175°C). Line a 9×9-inch baking pan with parchment paper, leaving overhang on two opposite sides to create handles. Lightly grease the pan under the parchment if desired to help it stay in place.
- Mix the cookie crust: In a medium mixing bowl, whisk together the flour, granulated sugar, cinnamon, and salt for the crust. Pour in the melted, slightly cooled butter and vanilla extract. Stir until the mixture resembles damp sand and starts to clump; it should be crumbly but hold together when pressed.
- Press and par-bake the crust: Transfer the crust mixture to the prepared pan and press it firmly and evenly into the bottom using your fingertips or the bottom of a measuring cup. Bake for 10–12 minutes, just until the crust looks set and slightly puffed but not browned. While the crust bakes, prepare the filling.
- Beat cream cheese and ricotta: In a large bowl, beat the softened cream cheese with a hand mixer on medium speed until smooth and fluffy, 1–2 minutes. Add the ricotta and beat again until very smooth and well combined, scraping down the sides of the bowl as needed.
- Add sugars, flavorings, and salt: Add the granulated sugar, powdered sugar, salt, vanilla extract, almond extract (if using), and orange zest to the ricotta mixture. Beat on medium speed until creamy and slightly thickened, about 1–2 minutes.
- Incorporate eggs and chocolate chips: Add the eggs one at a time, mixing on low speed just until each egg is incorporated. Do not overmix. Gently fold in the mini chocolate chips with a spatula until evenly distributed.
- Assemble the bars: When the crust comes out of the oven, let it cool for about 5 minutes. Pour the ricotta filling evenly over the warm crust and spread it into the corners. If using pistachios, sprinkle them evenly over the top.
- Bake the cannoli bars: Return the pan to the oven and bake at 350°F (175°C) for 30–35 minutes, until the edges are set, the center is mostly set with a slight wobble, and a toothpick inserted near the center comes out mostly clean with a few moist crumbs. If the top begins to brown too quickly, tent loosely with foil for the last 5–10 minutes.
- Cool and chill: Remove the pan from the oven and place it on a wire rack. Cool completely to room temperature, then cover and chill in the refrigerator for at least 3 hours, preferably overnight, until the filling is fully set.
- Slice and serve: Use the parchment overhang to lift the chilled slab out of the pan onto a cutting board. For the cleanest cuts, run a sharp knife under hot water, wipe dry, and slice into 16–20 bars, wiping the knife between cuts. Serve chilled or slightly cool.
Notes
- Drain the ricotta cheese well if it’s very watery to avoid a watery filling.
- The almond extract is optional but adds a traditional cannoli flavor.
- Orange zest can be substituted with lemon zest for a different citrus note.
- For neat slices, warm the knife blade between cuts to prevent cracking.
- If the top browns too quickly during baking, loosely tent the pan with foil to prevent over-browning.
- These bars are best served chilled and can be stored in the refrigerator for up to 3 days.
- The pistachios add a nice crunch and color but can be omitted or replaced with chopped nuts of your choice.
Keywords: Cannoli bars, ricotta dessert, Italian dessert bars, cream cheese bars, easy cannoli, baked ricotta dessert, chocolate chip cannoli bars