Chocolate-Coated Homemade Protein Bars Recipe
Introduction
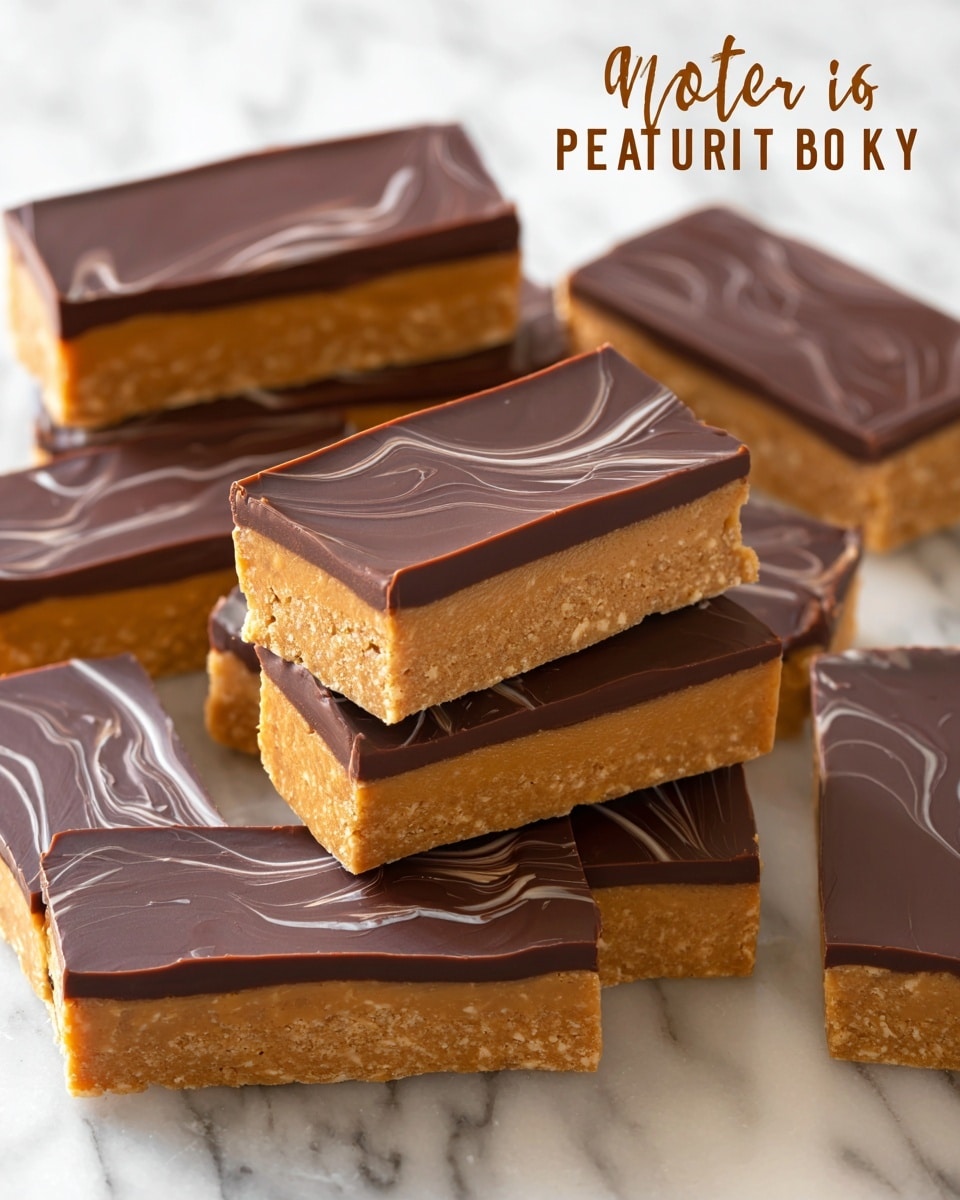
These homemade protein bars are a simple and delicious way to fuel your day. Made with just a few wholesome ingredients, they’re perfect for a healthy snack or post-workout bite. Customize them with your favorite protein powder and optional chocolate coating for a tasty treat.

Ingredients
- 1 1/2 cups peanut butter or allergy-friendly alternative
- 3/4 cup protein powder (about 90g), unsweetened preferred
- 1/4 cup pure maple syrup or honey
- 1/2 teaspoon salt
- 4 oz melted chocolate chips (optional)
Instructions
- Step 1: In a mixing bowl, combine the peanut butter, protein powder, maple syrup (or honey), and salt. Stir well until the mixture forms a thick dough.
- Step 2: Shape the dough into bars by hand or press it evenly into a lined 8×8-inch pan.
- Step 3: (Optional) Spread the melted chocolate chips over the top. For a smoother chocolate coating, stir in 2 teaspoons of oil before spreading.
- Step 4: Refrigerate the bars until firm and chilled, about 1-2 hours. If using a pan, cut into bars before serving.
Tips & Variations
- Make sure you enjoy the flavor of the protein powder you use, as it greatly affects the taste. Unsweetened is recommended, but feel free to experiment with different flavors.
- For a nut-free version, substitute peanut butter with sunflower seed butter or another allergy-friendly alternative.
- Add-ins like chopped nuts, seeds, or dried fruit can be mixed into the dough for extra texture and flavor.
- Dip bars individually in melted chocolate and chill to set if you prefer a fully coated treat.
Storage
Store protein bars in an airtight container in the refrigerator for up to one week. For longer storage, freeze the bars wrapped individually for up to one month. Thaw in the refrigerator before eating. If coated with chocolate, keep refrigerated to prevent melting and maintain firmness.
How to Serve
Serve this delicious recipe with your favorite sides.
FAQs
Can I use any type of protein powder?
Yes, you can use any protein powder you like, but the flavor and sweetness level can affect the final taste. Unsweetened protein powder is recommended for best control over flavor.
How do I make the bars without peanut butter?
You can substitute peanut butter with other nut or seed butters, such as almond butter, cashew butter, or sunflower seed butter, to suit allergies or preferences.
PrintChocolate-Coated Homemade Protein Bars Recipe
These homemade protein bars are a simple and nutritious snack made with peanut butter, protein powder, and natural sweeteners. They can be easily customized with your favorite flavors and optionally coated in melted chocolate for an indulgent touch. Perfect for on-the-go energy boosts or post-workout fuel.
- Prep Time: 10 minutes
- Cook Time: 0 minutes
- Total Time: 1 hour 10 minutes (including chilling time)
- Yield: 8 bars 1x
- Category: Snack
- Method: No-Cook
- Cuisine: American
- Diet: Vegetarian
Ingredients
Main Ingredients
- 1 1/2 cup peanut butter or allergy-friendly substitute
- 3/4 cup protein powder (90g)
- 1/4 cup pure maple syrup or honey
- 1/2 tsp salt
Optional
- 4 oz melted chocolate chips
- 2 tsp oil (to mix with chocolate for smoother coating)
Instructions
- Prepare the dough: In a mixing bowl, combine the peanut butter, protein powder, maple syrup or honey, and salt. Stir thoroughly until a thick, dough-like mixture forms.
- Shape the bars: Either shape the mixture into bars by hand or press it evenly into a lined 8×8 inch pan for a uniform slab to be cut later.
- Add chocolate coating (optional): If using, melt the chocolate chips and optionally stir in 2 teaspoons of oil to create a smoother chocolate sauce. Spread this melted chocolate evenly over the formed bars in the pan or dip each shaped bar individually into the chocolate.
- Chill: Refrigerate the bars, or the pan if using mold style, until chilled and firm, usually around an hour or more.
- Serve: If made in a pan, cut into bars once set. Enjoy your protein bars as a healthy snack.
Notes
- Ensure you like the flavor of your protein powder, as it impacts the taste significantly.
- If you want a smoother chocolate coating, mix oil into the melted chocolate.
- These bars can be customized with different protein powder flavors and sweeteners.
- Keep refrigerated for best texture and freshness.
- This recipe pairs well with other high-protein snacks like Protein Banana Bread and Chickpea Cookie Dough Dip.
Keywords: protein bars, healthy snack, peanut butter bars, no-bake protein bars, homemade protein bars, vegan protein bars, quick protein snack