Classic Butter Thumbprint Cookies Recipe
If you’re craving a timeless treat that combines buttery richness with a burst of fruity sweetness, you’re in for a real delight with these Classic Butter Thumbprint Cookies. Imagine tender, melt-in-your-mouth cookie dough hugging a perfectly nestled dollop of your favorite jam — it’s comfort and elegance baked into one little bite. This recipe is truly a joyous tradition, perfect for sharing with friends or savoring alongside your favorite hot beverage. With each thumbprint pressed and jam-filled, these cookies become a warm invitation to gather and celebrate simple pleasures.
Ingredients You’ll Need
These ingredients are straightforward but essential, each playing a vital role in creating the perfect texture and flavour harmony of Classic Butter Thumbprint Cookies. The simplicity of this list makes the recipe accessible for bakers of all experience levels, while the quality of each element shines through in the final cookie.
- 1 cup unsalted butter, softened: Provides a rich, creamy base that ensures the cookies melt gently in your mouth.
- ½ cup granulated sugar: Sweetens the dough just right and helps achieve a light, fluffy texture when creamed with butter.
- 2 tsp vanilla extract: Adds warm aromatic depth that enhances the buttery flavour beautifully.
- 2 cups all-purpose flour: Gives structure and tenderness, forming the perfect crumb for these cookies.
- ½ tsp salt: Balances sweetness and intensifies flavours, making every bite pop.
- ½ cup fruit jam (raspberry, strawberry, or apricot): The star of the show that fills each cookie with bright, fruity goodness.
How to Make Classic Butter Thumbprint Cookies
Step 1: Preheat and Prepare Your Baking Space
Start by setting your oven to 350°F (175°C) and lining a baking sheet with parchment paper. This not only ensures even baking but also makes clean-up a breeze. Preparing your oven and workspace ahead makes the whole process flow smoothly and keeps your cookies perfectly shaped.
Step 2: Cream Butter and Sugar
In a large mixing bowl, use an electric mixer or stand mixer to cream the softened butter and sugar together. Beat for about 2-3 minutes until your mixture is light, pale, and fluffy. This step is crucial because it incorporates air that helps create tender texture in your cookies.
Step 3: Add Vanilla and Combine Dry Ingredients
Mix in the vanilla extract until just incorporated. Then, gradually add the all-purpose flour and salt. Mix gently until the dough begins to come together, being careful not to over-mix to keep your cookies tender and soft.
Step 4: Shape the Dough
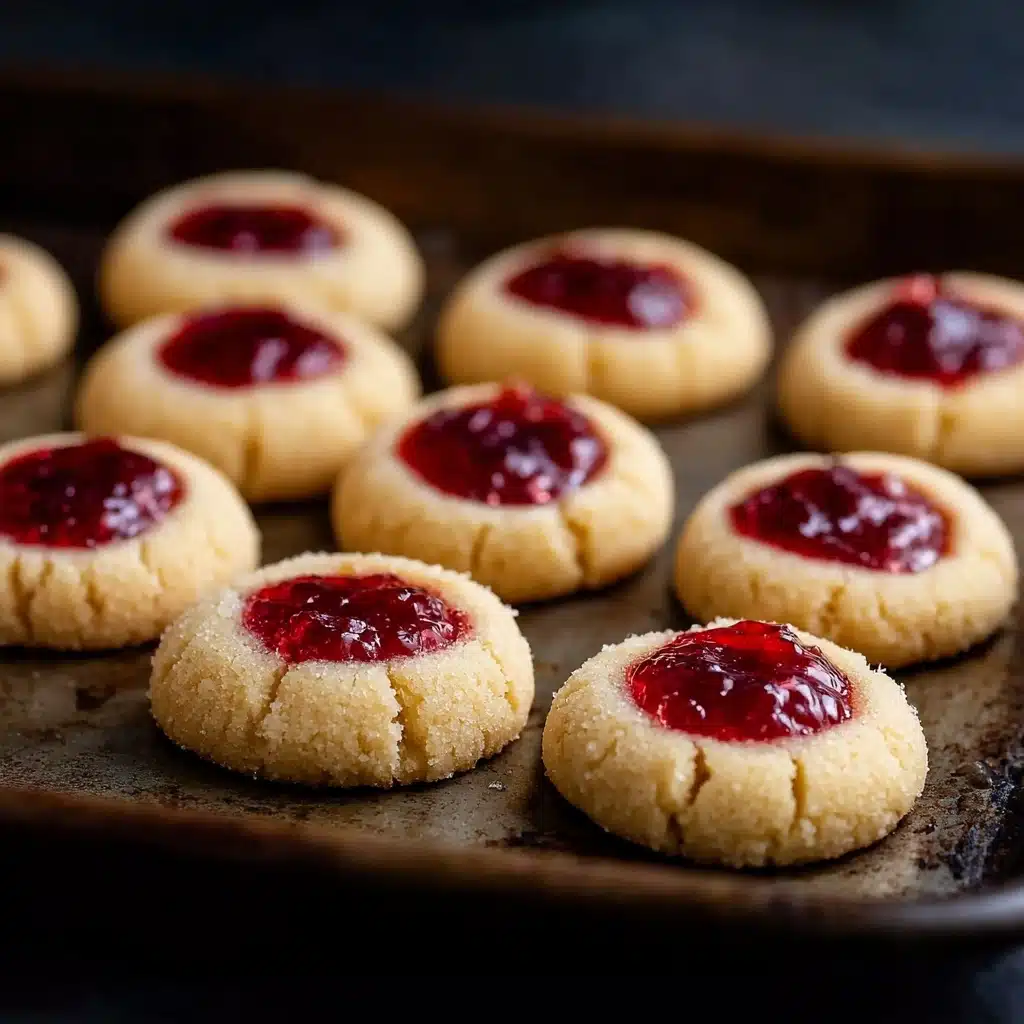
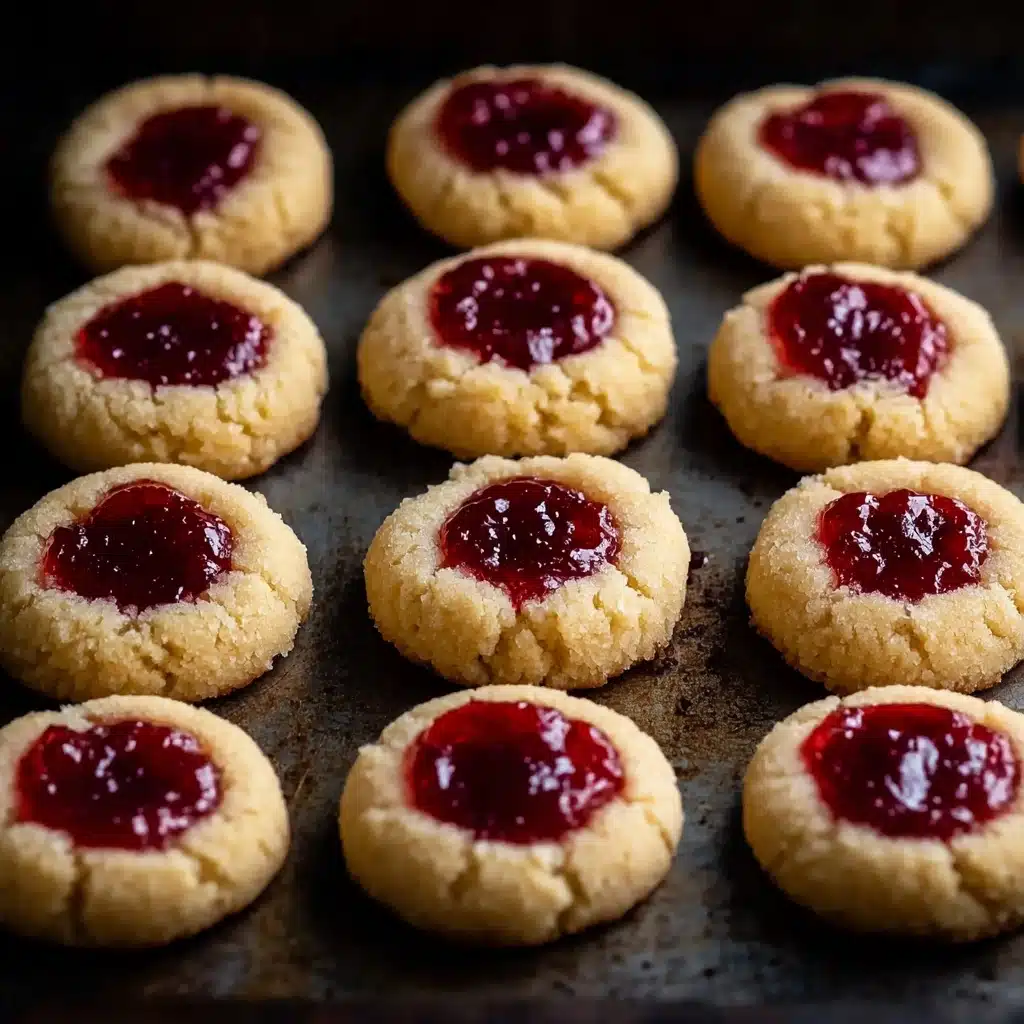
Roll the dough into approximately 1-inch balls and place them on the prepared baking sheet, spacing them about 2 inches apart. Press a deep indentation into the center of each dough ball using your thumb or the back of a small spoon — this is where all the jam magic happens.
Step 5: Fill the Thumbprint
Spoon about ½ teaspoon of your chosen fruit jam into each indentation. The jam adds that irresistible burst of flavor and a beautiful jewel-like color that makes these cookies visually stunning.
Step 6: Bake to Perfection
Bake for 10-12 minutes, or until the edges are just beginning to turn golden. Baking too long can dry them out, so watch closely for that perfect delicate color.
Step 7: Cooling
Allow the cookies to cool on the baking sheet for about 5 minutes before transferring them to a wire rack. This waiting time helps the cookies firm up slightly without losing their soft bite and prevents the jam from spilling.
How to Serve Classic Butter Thumbprint Cookies
Garnishes
Enhance your Classic Butter Thumbprint Cookies by dusting them lightly with powdered sugar for a snowy, festive look, or add a small fresh berry atop the jam for a pop of natural color. These small touches make the cookies feel extra special.
Side Dishes
These cookies pair beautifully with cozy drinks like hot chocolate, chai tea, or a cup of strong espresso. The buttery, jammy sweetness provides a perfect counterpoint to warm, comforting beverages, making snack time extra indulgent.
Creative Ways to Present
Try arranging these cookies on a wooden or slate platter, sandwiched between sheets of parchment. Consider layering different jam flavors for a colorful display that’s as inviting visually as it is delicious. Wrapping small batches in clear cellophane tied with ribbon makes them wonderful homemade gifts for friends and neighbors.
Make Ahead and Storage
Storing Leftovers
Classic Butter Thumbprint Cookies stay fresh for 5 to 7 days when stored in an airtight container at room temperature. Keeping them away from sunlight and heat preserves the jam’s vibrant flavor and keeps the cookie texture just right.
Freezing
You can freeze these cookies before or after adding jam. Place them in a freezer-safe container with parchment layers to prevent sticking, then freeze for up to 3 months. Thaw at room temperature before serving to enjoy their full freshness.
Reheating
If you want to enjoy a warm cookie, gently reheat individually in the microwave for about 10 seconds or pop a few in the oven at low heat for 3-4 minutes. This enhances their buttery softness and helps the jam become slightly gooey again.
FAQs
How long do Butter Thumbprint Cookies stay fresh?
They stay fresh for 5 to 7 days in an airtight container at room temperature, as long as they are kept in a cool, dry place away from direct sunlight.
Can I freeze Butter Thumbprint Cookies?
Yes, freezing works well. You can freeze the dough balls before baking or the finished cookies after adding jam. Wrap them properly to avoid freezer burn, and thaw at room temperature before enjoying.
What are the best jams to use for thumbprint cookies?
Raspberry, strawberry, and apricot are classic choices because they hold their shape and offer a balanced sweetness that complements the buttery dough. Feel free to experiment with mixed berry, cherry, or marmalade for new flavor experiences.
Can I make these cookies gluten-free?
Yes! Substitute the all-purpose flour with a gluten-free flour blend that contains xanthan gum to keep the structure and texture similar. Double-check all ingredients for gluten-free certification.
How do I prevent my thumbprint cookies from cracking?
Ensure your butter is softened but not too soft to avoid greasy dough. Handle the dough gently, make indentations carefully, and consider chilling the dough before baking to reduce spreading and cracking.
Final Thoughts
There’s something truly heartwarming about Classic Butter Thumbprint Cookies. They invite you to slow down, enjoy the sweet moments, and share joy with loved ones. Once you try this easy recipe, it’ll become one of your go-to treats for holidays and everyday indulgences alike. So grab your butter, your favorite jam, and start pressing those perfect thumbprints — a batch of happiness is just an oven away!
PrintClassic Butter Thumbprint Cookies Recipe

These classic Butter Thumbprint Cookies are buttery, tender, and filled with your choice of sweet fruit jam, making them a perfect treat for holiday gatherings or any time you crave a melt-in-your-mouth cookie with a delightful fruity center.
- Prep Time: 15 minutes
- Cook Time: 12 minutes
- Total Time: 27 minutes
- Yield: 24 cookies 1x
- Category: Dessert
- Method: Baking
- Cuisine: American
- Diet: Vegetarian
Ingredients
For the Cookies:
- 1 cup unsalted butter, softened
- ½ cup granulated sugar
- 2 tsp vanilla extract
- 2 cups all-purpose flour
- ½ tsp salt
- ½ cup fruit jam (raspberry, strawberry, or apricot)
Instructions
- Preheat the Oven: Preheat your oven to 350°F (175°C). Line a baking sheet with parchment paper for easy clean-up.
- Make the Cookie Dough: In a large mixing bowl, cream together the softened butter and sugar until the mixture is light and fluffy, about 2-3 minutes. Add the vanilla extract and mix until fully incorporated. Gradually add the flour and salt, mixing until the dough just comes together without overworking it.
- Shape the Cookies: Roll the dough into 1-inch balls and place them on the prepared baking sheet, spacing them about 2 inches apart. Use your thumb or the back of a small spoon to gently make an indentation in the center of each cookie ball.
- Fill the Indentation: Spoon approximately ½ teaspoon of your preferred fruit jam into each indentation, filling the center without overfilling to avoid spilling during baking.
- Bake the Cookies: Bake the cookies in the preheated oven for 10-12 minutes, or until the edges are lightly golden and the cookies are set but still soft in the center.
- Cool the Cookies: Allow the cookies to cool on the baking sheet for 5 minutes to firm up, then transfer them to a wire rack to cool completely before serving.
- Serve & Enjoy: Once fully cooled, serve these charming, jam-filled cookies as a festive treat perfect for sharing during holidays or any special occasion.
Notes
- Don’t overmix the dough to avoid tough cookies.
- Ensure the butter is softened to room temperature for easier mixing.
- Measure ingredients precisely for the best texture.
- Chilling the dough before baking helps prevent spreading and cracking.
- Store cookies in an airtight container at room temperature to keep fresh for 5-7 days.
- Cookies can be frozen for up to 3 months either before or after adding the jam.
- Try different jams or fillings like chocolate ganache, Nutella, or salted caramel for variation.
- Adding citrus zest or a pinch of spices like cardamom or nutmeg can enhance flavor.
- Perfect for involving kids in baking; they can make the thumbprints and add the jam.
Nutrition
- Serving Size: 1 cookie
- Calories: 110 kcal
- Sugar: 7 g
- Sodium: 50 mg
- Fat: 6 g
- Saturated Fat: 3.5 g
- Unsaturated Fat: 2.5 g
- Trans Fat: 0 g
- Carbohydrates: 13 g
- Fiber: 0.3 g
- Protein: 1 g
- Cholesterol: 20 mg
Keywords: butter thumbprint cookies, jam cookies, holiday cookies, classic cookie recipe, easy cookie recipe