Garlic Parmesan Cheeseburger Bombs Recipe
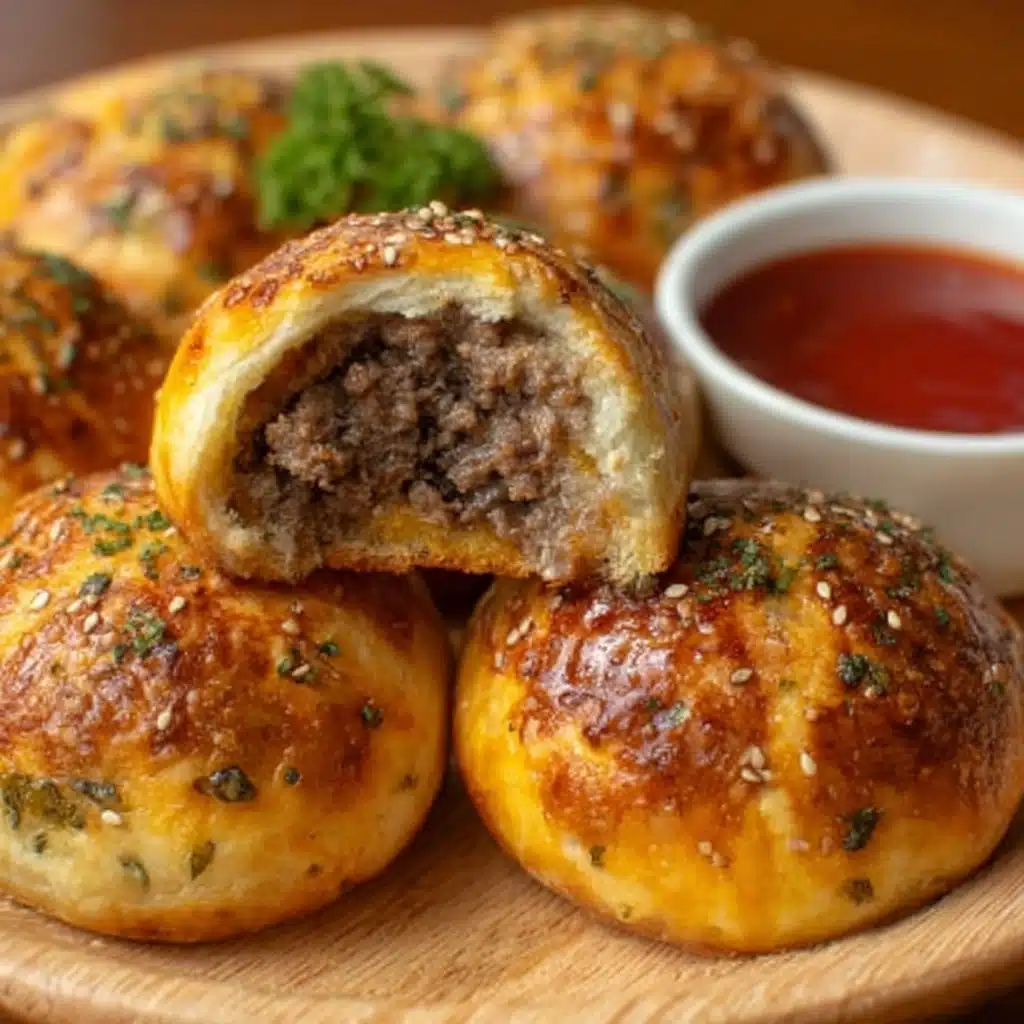
If you are searching for an irresistible party appetizer or a fun twist on the traditional cheeseburger, these Garlic Parmesan Cheeseburger Bombs will absolutely steal the show. Imagine juicy seasoned ground beef and sharp cheddar cheese wrapped inside flaky biscuit dough, all coated in garlicky butter and a crispy Parmesan crust. Each bite bursts with flavor, combining the comforting familiarity of a cheeseburger with a playful, handheld presentation that’s perfect for any occasion. Let me take you through every delicious detail so you can recreate this crowd-pleaser in your own kitchen!
Ingredients You’ll Need
These ingredients might seem simple, but each one plays a crucial role in building the bold, savory, and cheesy flavor profile that makes Garlic Parmesan Cheeseburger Bombs so unforgettable. From melting sharp cheddar to the fragrant garlic butter, every component is essential.
- 1 lb ground beef (80–85% lean): The juicy foundation packed with meaty richness and perfect fat content to keep the filling moist.
- 1 cup shredded sharp cheddar cheese: Adds a sharp tang and gooey melt that defines the cheeseburger core of the bomb.
- 1 can refrigerated biscuit dough (16.3 oz; 8 large biscuits): Fluffy pockets that hold everything together with a golden, flaky finish.
- 4 tbsp unsalted butter, melted: Creates the indulgent garlic butter coating that keeps these bombs irresistibly moist and flavorful.
- 3 cloves garlic, minced: Infuses a bold punch of aromatic garlic into the butter for that extra savory hit.
- 1/2 cup grated Parmesan cheese: Provides a nutty, crispy crust that elevates texture and flavor.
- 1 tsp Italian seasoning: A fragrant mix of herbs to complement the beef and cheese.
- 3/4 tsp kosher salt: Enhances every flavor, locking in savory goodness.
- 1/2 tsp black pepper: Adds subtle heat and complexity.
- 1 tbsp chopped fresh parsley (optional, for topping): A fresh, colorful garnish that brightens up the final presentation.
How to Make Garlic Parmesan Cheeseburger Bombs
Step 1: Preheat and Prepare
Start by preheating your oven to 375°F (190°C) and lining a baking sheet with parchment paper. This ensures your bomb crusts bake evenly and don’t stick—key for a clean release and beautiful presentation.
Step 2: Brown the Ground Beef
Heat a skillet over medium heat and cook the ground beef until it’s nicely browned and no longer pink, breaking it apart as it cooks. This step unlocks rich beefy flavor, and draining the excess fat prevents greasiness.
Step 3: Season and Cool the Filling
Once the beef is cooked, season it with kosher salt and black pepper, then let it cool for a few minutes. Cooling is important because hot filling can cause cheese to leak and dough to become soggy during assembly.
Step 4: Add the Cheddar Cheese
Mix shredded sharp cheddar cheese into the warm beef until just melted and well combined. This creates that signature cheeseburger gooeyness, making every bite decadently cheesy without overpowering the flavors.
Step 5: Prepare the Garlic Butter
In a small bowl, combine melted butter with minced garlic and, if using, fresh chopped parsley. This fragrant garlic butter is what transforms these bombs from ordinary to unforgettable by infusing them with buttery richness and vibrant aroma.
Step 6: Shape the Dough
Separate the biscuit dough into individual pieces, then gently flatten each into a 4–5 inch round. This creates just enough surface area to encase the filling without tearing.
Step 7: Fill and Seal the Bombs
Place about two tablespoons of the beef and cheese mixture into the center of each dough round. Carefully pull the edges up and around the filling, pinching and sealing the dough into tight balls. Proper sealing is key to keeping the gooey center intact as they bake.
Step 8: Brush with Garlic Butter and Coat with Parmesan
Brush each dough ball generously with your prepared garlic butter, then roll or sprinkle them in a shallow dish of Parmesan cheese combined with Italian seasoning. This coating crisps beautifully in the oven, adding irresistible texture and flavor layers.
Step 9: Bake to Golden Perfection
Place the bombs seam-side down on the lined baking sheet and bake for 12 to 15 minutes until they turn a deep golden brown and are cooked through. The cheese inside will be bubbling, and the crust delightfully crisp.
Step 10: Rest and Final Touch
Let the bombs rest for about 5 minutes after baking. This short cooling time allows the melted cheese to set slightly, preventing a molten mess. Before serving, brush with any leftover garlic butter and sprinkle with fresh parsley for a pop of color and fresh flavor.
How to Serve Garlic Parmesan Cheeseburger Bombs
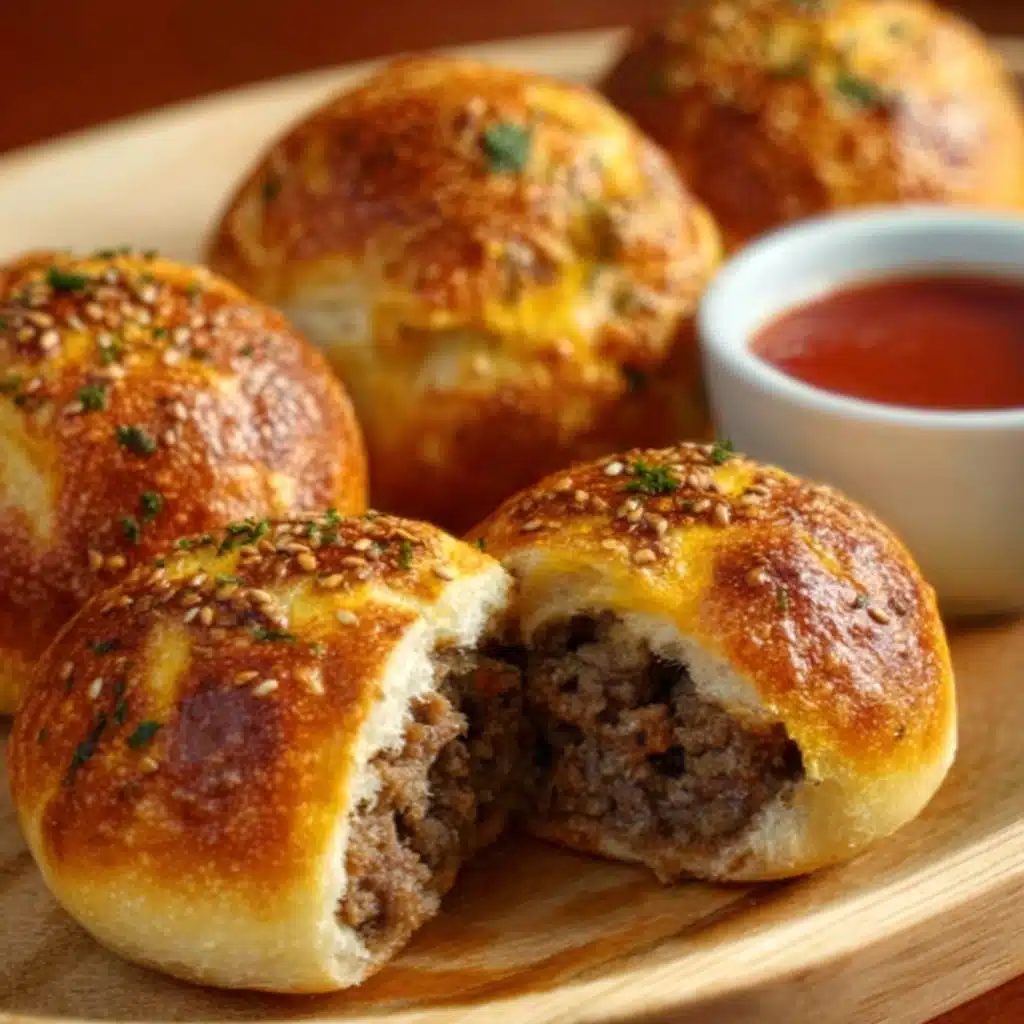
Garnishes
A sprinkle of fresh chopped parsley or a drizzle of extra garlic butter immediately elevates these bombs. For those who love a little heat, a dash of crushed red pepper flakes is a perfect addition. These small touches make these bites even more inviting on the plate.
Side Dishes
Pair Garlic Parmesan Cheeseburger Bombs with crispy fries or a fresh salad to balance the indulgent richness. Creamy coleslaw or roasted veggies make fantastic companions that add color and texture without overwhelming the main attraction.
Creative Ways to Present
Serve these bombs in a basket lined with parchment paper for a casual get-together or arrange them neatly on a platter with toothpicks for easy grab-and-go serving. You can even set up a dipping station with ketchup, spicy mayo, or ranch dressing to add another layer of fun and flavor.
Make Ahead and Storage
Storing Leftovers
Leftover Garlic Parmesan Cheeseburger Bombs store well in an airtight container in the refrigerator for up to 3 days. Keeping them sealed preserves moisture and flavor, making for an easy next-day snack or quick meal.
Freezing
To freeze, arrange baked bombs on a tray to freeze individually first, then transfer them to a freezer-safe bag or container. This prevents sticking and keeps their shape intact. They can be frozen for up to 2 months—perfect for meal prep or a last-minute treat.
Reheating
Reheat in an air fryer at 350°F (175°C) for 3-4 minutes to bring back that crispy crust, or warm in the oven on a baking sheet at 350°F until heated through. Avoid microwaving if possible, as it can make the dough soggy and less enjoyable.
FAQs
Can I use different cheeses for Garlic Parmesan Cheeseburger Bombs?
Absolutely! While sharp cheddar is classic, feel free to swap in mozzarella for extra stretchiness, pepper jack for a spicy kick, or smoked gouda for a deeper smoky flavor. Mixing cheeses can create interesting and delicious variations.
How do I prevent the filling from leaking during baking?
Letting the seasoned ground beef mixture cool before stuffing is the key. Hot filling softens the dough and causes leaks. Also, make sure to pinch dough seams tightly and avoid overfilling to keep everything neatly sealed inside.
Can I prepare these bombs in advance and bake later?
Yes! You can assemble the bombs and refrigerate them for a few hours or overnight before baking. Just cover the tray tightly with plastic wrap and bake them straight from the fridge—add a couple extra minutes if needed.
Are Garlic Parmesan Cheeseburger Bombs suitable for freezing before baking?
You can freeze them unbaked by shaping the bombs and placing them on a parchment-lined tray, then freezing until solid. Once frozen, transfer to a freezer bag. When ready, bake from frozen adding a few extra minutes to the baking time.
What dipping sauces go well with these cheeseburger bombs?
Classic ketchup and mustard are always winners, but creamy ranch, spicy chipotle mayo, or even a tangy barbecue sauce can beautifully complement the savory, cheesy filling and garlicky crust.
Final Thoughts
If you want to wow your friends or family with something that’s both comforting and exciting, you simply have to try making Garlic Parmesan Cheeseburger Bombs. They bring together the best of juicy cheeseburger flavors wrapped in buttery, garlicky goodness, perfect for snack time or game day. Once you taste one, I bet they’ll quickly become your go-to showstopper for any gathering. Happy baking and even happier eating!
PrintGarlic Parmesan Cheeseburger Bombs Recipe
These Garlic Parmesan Cheeseburger Bombs are a delicious and easy appetizer featuring juicy ground beef mixed with melted sharp cheddar cheese, all wrapped in flaky biscuit dough. They’re brushed with a savory garlic butter, coated with Parmesan and Italian seasoning, and baked to golden perfection. Perfect for game days, parties, or a tasty snack any time!
- Prep Time: 15 minutes
- Cook Time: 15 minutes
- Total Time: 30 minutes
- Yield: 8 cheeseburger bombs 1x
- Category: Appetizer / Snack
- Method: Baked
- Cuisine: American
- Diet: Low Salt
Ingredients
Cheeseburger Bombs
- 1 lb ground beef (80–85% lean)
- 1 cup shredded sharp cheddar cheese
- 1 can refrigerated biscuit dough (16.3 oz; 8 large biscuits)
Garlic Parmesan Coating
- 4 tbsp unsalted butter, melted
- 3 cloves garlic, minced
- 1/2 cup grated Parmesan cheese
- 1 tsp Italian seasoning
- 3/4 tsp kosher salt
- 1/2 tsp black pepper
- 1 tbsp chopped fresh parsley (optional, for topping)
Instructions
- Preheat Oven: Preheat the oven to 375°F (190°C) and line a baking sheet with parchment paper to prevent sticking and ensure easy cleanup.
- Brown the Beef: Heat a skillet over medium heat and cook the ground beef, breaking it up with a spoon, until it is no longer pink, about 5-6 minutes. Drain any excess fat to keep the filling from being greasy.
- Season the Filling: Stir in the kosher salt and black pepper into the cooked beef. Let the seasoned beef cool for 3-4 minutes to prevent the cheese from leaking out when assembling.
- Add Cheese: Mix the shredded sharp cheddar cheese into the warm ground beef until the cheese is just melted and well combined, creating a cheesy, savory filling.
- Prepare Garlic Butter: In a small bowl, combine the melted unsalted butter with the minced garlic and chopped fresh parsley if using. This mixture will flavor the exterior.
- Flatten Dough: Separate the biscuit dough into individual pieces. Gently press each biscuit into a 4-5 inch round on a clean surface, ready to be filled.
- Fill and Seal: Spoon about 2 tablespoons of the beef and cheese mixture into the center of each biscuit round. Carefully pull the edges of the dough up and around the filling, pinching to seal tightly into a ball to prevent leaking.
- Brush and Coat: Brush each dough ball generously with the garlic butter mixture. Then roll each in a shallow dish containing the grated Parmesan cheese mixed with Italian seasoning, coating all sides.
- Bake: Place the stuffed dough balls seam-side down on the prepared baking sheet. Bake in the preheated oven for 12-15 minutes, or until they turn deep golden brown and are cooked through.
- Rest and Serve: Let the cheeseburger bombs cool for 5 minutes to allow the cheese to set. Brush with any remaining garlic butter and sprinkle with additional fresh parsley before serving.
Notes
- Chill the beef and cheese filling for 5-10 minutes if it’s very hot; cooler filling seals better and prevents leaks during assembly.
- Swap the cheddar cheese for mozzarella for extra cheesy pull, pepper jack for a spicy kick, or smoked gouda for a smoky depth of flavor.
- To reheat, use an air fryer set to 350°F (175°C) for 3-4 minutes to restore the crispy exterior without drying out the filling.
Nutrition
- Serving Size: 1 bomb
- Calories: 380
- Sugar: 2g
- Sodium: 690mg
- Fat: 24g
- Saturated Fat: 12g
- Unsaturated Fat: 10g
- Trans Fat: 0g
- Carbohydrates: 22g
- Fiber: 1g
- Protein: 19g
- Cholesterol: 85mg
Keywords: Garlic Parmesan Cheeseburger Bombs, cheeseburger appetizer, stuffed biscuits, game day snacks, baked cheeseburger bites

